Step 3 - Implement the 'About Us' Page
This step involves adding another navigation link to our navigation bar to take the user to an 'About Us' page, like so

Updating the Navigation Bar
Adding the link is quite straightforward so open up your index.html page and add the following html code to the list of links
<li><a href="#about"><i class="fa fa-info"></i> About</a></li>
Save the file and a quick refresh of the page in your browser should display the expected result.
Adding 'about.html'
We'll keep this page fairly simple for the moment so create a new file (about.html) within the 'pages' directory/folder of your webapp folder and place the following html inside it.
<div class="jumbotron text-center">
    <h1>About Us</h1>

    <p>{{ message }}</p>
</div>
Wiring it all up - the 'About Us' Controller and Routing
This is where most of the work needs to be done in-so-far as we need to
- create a new controller object to manage the page and
- add a new route to ensure the link is correctly associated with the controller
Adding the Controller
First, open up your app.js file and navigate to where the other controllers have been implemented (around line 36 if you haven't added anything)
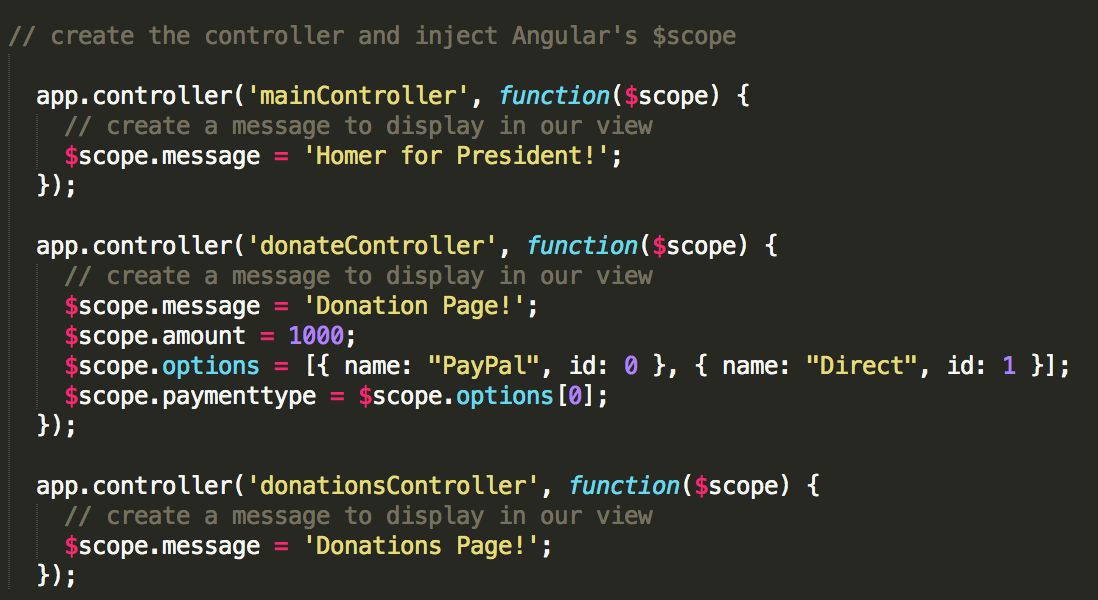
Add the following code AFTER the 'donationsController' controller (line 53+) - feel free to change the message!
app.controller('aboutController', function($scope) {
    $scope.message = 'Look! I am an about page.';
  });
Adding the Routing
Finally, within your app.js file, navigate to where the other routes have been implemented (around line 12 if you haven't added anything before it)
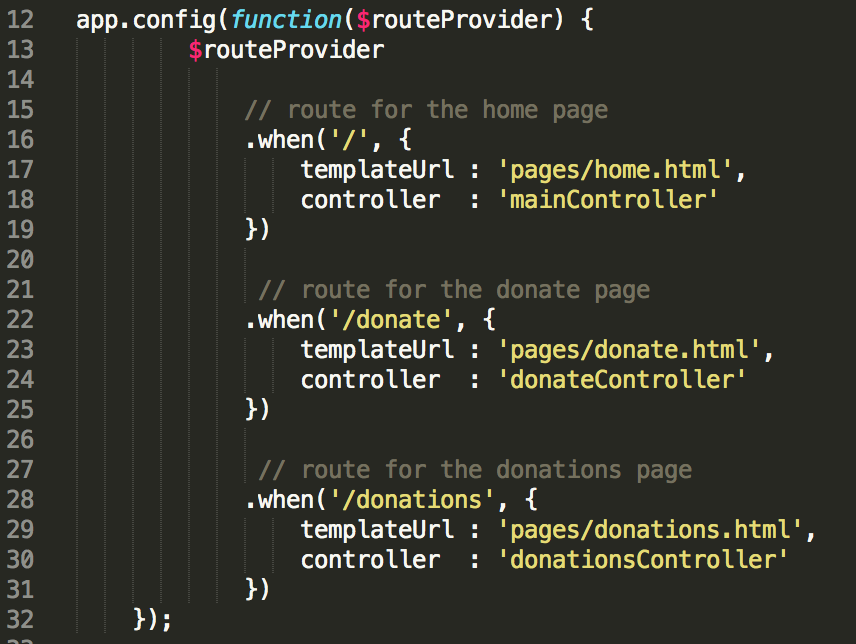
Add the following code AFTER line 31 AND BEFORE line 32 (so make some space!)
// route for the about page
            .when('/about', {
                templateUrl : 'pages/about.html',
                controller  : 'aboutController'
            })
Once again, make sure you save your file before you refresh in the browser. If all goes to plan you should now be able to navigate to the 'About Us' page and see your message displayed.