Step 3 - Importing our Angular Project
Before we make a start on the back-end, we first need to get our front-end setup so this step involves importing our previously implemented Angular app.
First, move the index.html file to the views/ directory. Because we're using the ejs engine, Node will be looking for files with the .ejs extension so we're going to have to rename our index.html to index.ejs, replacing the existing one.
Next, move the Angular app.js file to the public/javascripts/ directory. To avoid confusion with Node's app.js, also rename the Angular file to angularApp.js.
Finally let's update the script tag in our index.ejs file to reflect these changes:
<script src="/javascripts/angularApp.js"></script>
Now we can start our application by running
npm start
If we point our browser to http://localhost:3000 we should be greeted with the Home Page of our Angular application.
Setting Up the rest of our Angular Pages
You've problably guessed by now that none of the Nav Bar links are working, and we can't even see our homepage, so we need to import and rename all our existing html files to fix this.
To keep things a bit organised, firstly, create a new folder pages/ in the public/ directory. Then copy and rename the rest of our files into this folder public/pages/
Once completed, your project should look something like this
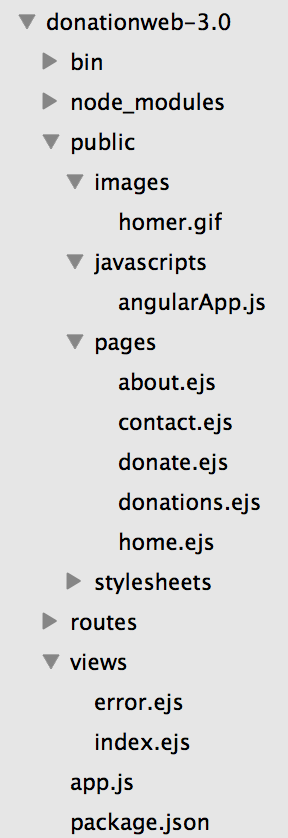
Now, point you browser at http://localhost:3000 again and see what you get?
It's still not working? Can you figure out the last modification you need to make?
(Hint - have a closer look at your routing in your angularApp.js)
You'll notice that the donate and list donations features aren't fully functional but that's due to the current structure of our app - which we'll fix in future steps.